


How to Set Up a Tarantula Enclosure for Beginners
Setting up a tarantula enclosure might feel like navigating a mix of terrarium specs and contradictory forum advice. The good news: once you match the container, substrate, and ventilation to the spider’s natural habits, the process becomes a repeatable checklist. While no two species are identical, a handful of grounded steps can sidestep the most common beginner headaches—from stuck sheds to runaway spiders.
Before You Start: Understanding Tarantula Needs
Each tarantula species brings its own humidity, temperature, and space needs, so the first step is matching the enclosure to the tarantula’s natural behavior. A Mexican Redknee (Brachypelma smithi) generally prefers 75–85°F, while a Chilean Rose (Grammostola rosea) does well at 70–80°F, based on temperature ranges noted by ExoticPetHub. Terrestrial and fossorial species—those that spend time on or under the ground—are often recommended for beginners because their micro-climate needs are more forgiving to learn. The goal with any setup is a stable micro-climate that holds warmth and moisture inside while keeping the spider securely contained. A lid that doesn’t latch or a ventilation grid that’s too open can unravel that balance quickly.
Step-by-Step Enclosure Setup
Setting up an enclosure follows four core steps: choosing the right container, adding a deep substrate layer, drilling ventilation holes, and furnishing hides and decor. These directions draw on techniques from Tom’s Big Spiders and ExoticPetHub, adapted here for a manageable beginner workflow.
Step 1: Select the Right Enclosure
A terrestrial spider needs a wide footprint, while an arboreal tarantula thrives in a tall, vertical space. For an off-the-shelf arboreal option, the Talis-us Acrylic Tarantula Enclosure measures 8″×8″×16″ and offers clear sight lines with a secure, escape-resistant design. On a budget, Sterilite Show Off containers (source-reported cost around $5.99) can be turned into functional terrestrial or arboreal homes with a few tools, a method detailed by Tom’s Big Spiders. Below is how common enclosure types compare.
| Type | Best For | Pros | Cons | Source-Reported Cost |
|---|---|---|---|---|
| Glass terrariums | Display, permanent setups | Excellent visibility, sturdy, holds humidity well | Heavy, breakable | Varies widely |
| Plastic containers | Budget builds, juveniles | Lightweight, cheap, easy to modify for ventilation | May warp under heat, less visibility | $5.99 (Sterilite Show Off) |
| Acrylic enclosures | Arboreal species, display | Crystal-clear, lightweight, escape-proof lids | Scratches easily | Not provided by source |
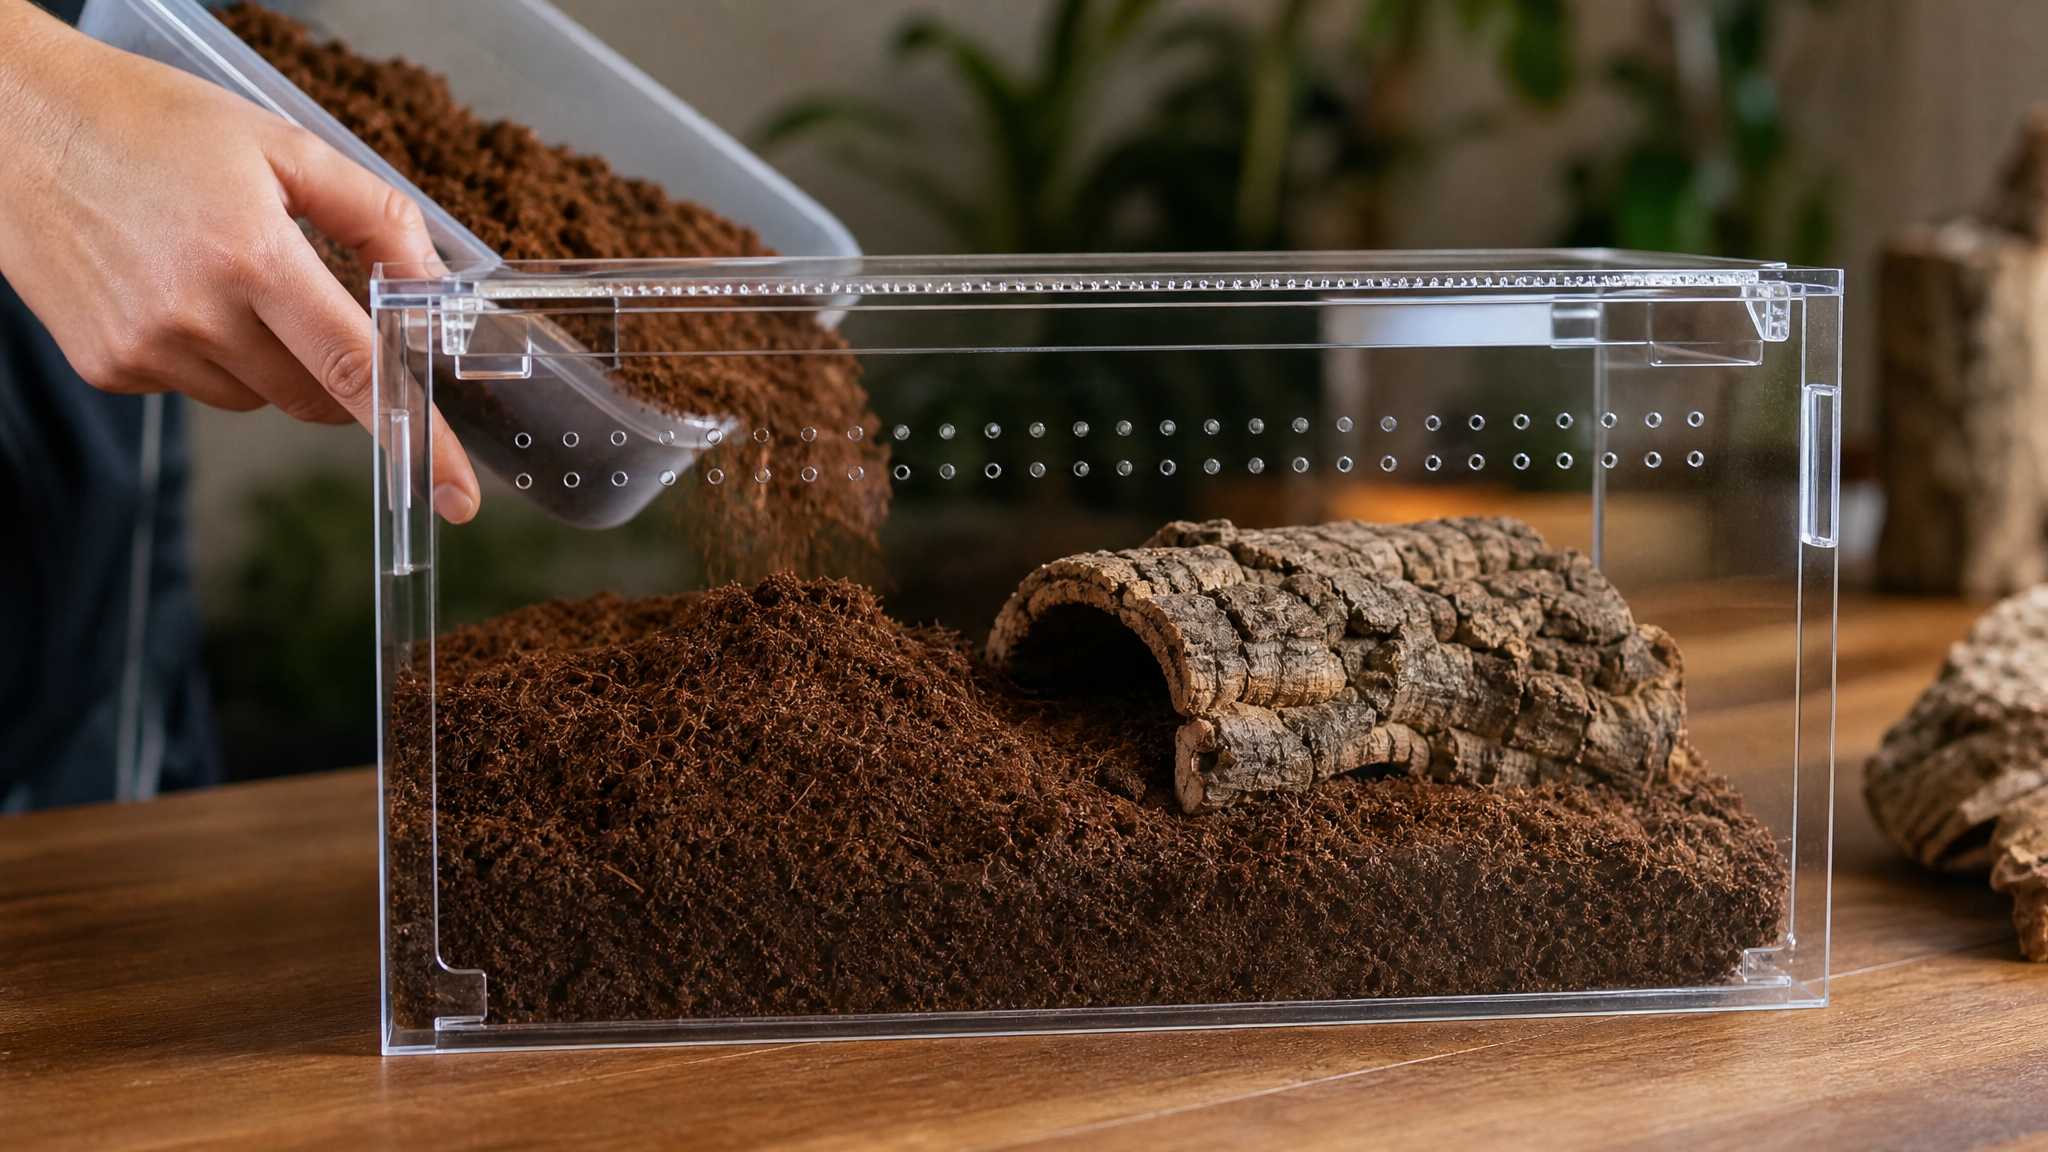
Step 2: Add Substrate
A 2–3 inch layer of packed-down Eco-earth coco fiber gives terrestrial tarantulas the burrowing depth they instinctively want. Mixing in long fiber sphagnum moss—available at stores like Home Depot—helps hold additional moisture for species that need higher humidity. Crucially, skip sand or gravel; ExoticPetHub notes these can cause respiratory problems if ingested. A deep, stable substrate also supports humidity and reduces the chance of a hard fall from a climbing tarantula.
Step 3: Install Ventilation
Airflow stops mold, but too many holes can destroy the very micro-climate you’re trying to build. For a plastic DIY enclosure, a J&L soldering iron (around $10) lets you melt 5–6 clean rows of holes on each side for cross-ventilation, as suggested by Tom’s Big Spiders. Simple holes work as well as plastic vents and are less expensive. Rectangular containers tend to be safer than rounded ones—a tarantula trying to climb a curved wall often ends up stuck or injured.
Step 4: Add Decor and Hides
A cork bark slab about 13–16 inches long, wedged firmly against the substrate or a corner, becomes a natural hide and climbing surface. New England Herpetoculture often sells cork bark at a lower price than typical pet stores, a helpful note for building multiple setups. Add a few faux foliage pieces like Petco plastic vines for enrichment, but arrange them so the spider has clear pathways; a cluttered enclosure can stress a tarantula that already feels exposed. The right decor isn’t just aesthetic—it gives the animal a secure place to retreat and de-stress.
Common Mistakes to Avoid
Most enclosure problems trace back to a few predictable errors. Here’s what to watch for:
- Sand or gravel substrate. Ingested particles can lead to respiratory irritation, and these materials don’t hold burrows or humidity.
- Too much ventilation. Wide-open tops or excessive holes dry out the enclosure, making it hard to maintain the humidity some species need.
- Inadequate temperature control. Extremes—especially sustained cold—can cause lethargy. Use a thermometer, and if supplemental heat is required, place a heat mat on the side, not under the tank, to avoid overheating.
- Over-misting. Soaking the substrate daily encourages mold. Instead, add water to the substrate corner for species that prefer moisture, and let the surface dry out between mistings.
Troubleshooting: Humidity, Mold, and Escape Issues
When something goes wrong inside the enclosure, small adjustments often bring things back in line. If humidity reads too low, add a pour of water to the substrate (not directly on the spider) or lightly mist one side; a humidity gauge helps you target the 60–80% range many species prefer. Too much humidity—or visible mold—calls for removing the affected substrate, increasing ventilation, and letting the enclosure air out a bit.
An escaped tarantula almost always means a gap in the lid or an overlooked opening. Smooth-sided containers can be climbed, so double-check every seam. If the spider refuses food or sits motionless for an unusual length of time, check the temperature and humidity first—the issue is often environmental. Heat mats should only touch the enclosure’s side, never the bottom, so a spider can move away from warmth when it needs to. Persistent refusal to eat paired with weight loss or odd postures warrants a vet visit, but for most beginner species, a quiet adjustment of the micro-climate is enough to get things back on track.

Written by Talis Us


Leave a comment
This site is protected by hCaptcha and the hCaptcha Privacy Policy and Terms of Service apply.